Hi,
Have you ever wondered when you may have seen many websites having header with a movie roll that displays some of their best photos? Why website headers, its great to have a movie roll that displays our own photographs, and its quite easy. The detailed steps to implement this are given:
The final image will be like this:
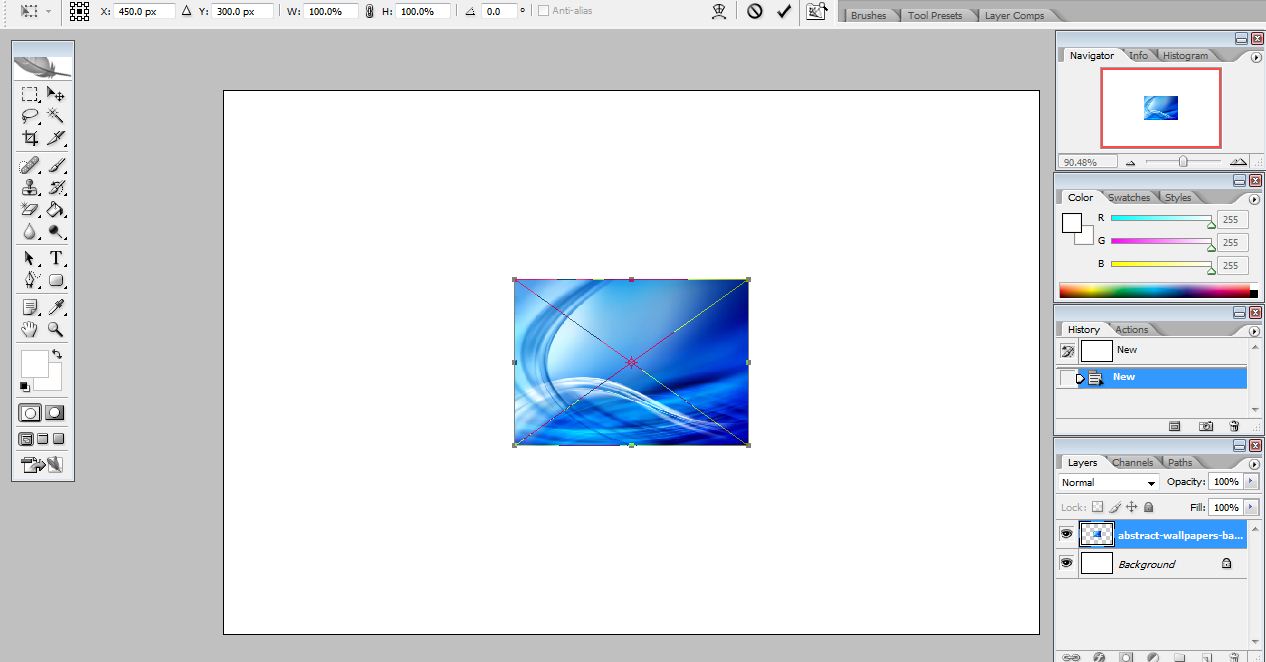
So, we start by creating a new photoshop document with a size of 900 by 600 pixels. Place a background image in the new document. This can be done by going to File --> Place and then after adjusting your image to fit in your document, right click on the image to place it.
Now, as seen from the image, we have got two layers, one is the background layer, and the other is the layer that starts with 'abstract'. We need to merge these two layers as there is no point in keeping these two layers separate.
Now open another document by going to File --> New and this time, give it a small dimension, say 500 by 300 pixels. Fill the newly created document with black. This can be done by simply pressing Ctrl + I simulataneously.
Now go to the select tool (the tool that shows a square) and select a portion of this black image. Now keeping the selected portion intact, right click on the selected portion and select Fill --> Background color. Before that, remember to change the background color to white.
Now select this whole image using Select --> All, and copy the image by using Edit --> Copy. Now open the previous document that may be minimized now, and paste the image using Edit --> Paste. You may have noticed that the pasted image is a new layer.
Now we need to reduce the size of this image. To do this use Edit --> Free Transform. When the free transform tool is used, you may have noted that the image now becomes a kind of selectable image. Now hold down Alt key, and gently use the mouse to control the size of the image. After reducing the size much, select the image and paste the same image 3 more times.
To copy the image, you need not select the image using the select tool, since when you use the select tool, the selection may not be 100 percent accurate, and you may end up losing parts of your image. So the easy way is to do it using the duplicate layer option. As can be seen from the above screenshot, there is layer called 'layer 1'. Right click on the layer 1 and select duplicate layer. You may give a new name to the new layer or use the default name as we are not at all concerned with it. Using the move tool, you can move the copy image in the position it accordingly. Do this 2 more times.
Now we need to place the images on each of those white spaces. To do this, place your pictures as you have done it for placing the background image. Use the move tool to move the image to the correct position and use the free transform tool to resize the image so as to fit the white space.
Like this, insert the images in the other white space also. The completed image is shown here.
Now we need to merge all these images to one single layer. To do this, select all layers except the background layer by holding control key, right click and select 'merge layers'.
Next thing is very important. You may have noted that the film rolls contain strips that are cut with little spacing between them. To achieve this, select the Eraser tool, and change the brush mode to square. To do this, select on the dropdown menu where it is written 'brush: '. Go down in the dropdown menu and select a brush having square shape. I use here a square brush of size 7.
We need to adjust the spacing between the erasing brush strokes. To do this go to the option that is shown in the below picture.
Select the brushes tab as shown, and select brush tip shape, and increase spacing to some 300. Thats it, we are set.
Hold down the shift key, and click on the (top) starting black portion of the image where stripes are needed. Remember click only once, and the next click should be on the ending portion of the black area. Repeat this in the bottom area also.
Now we need to shape this whole image to look like a film strip. To do this, select Edit --> Transform --> Warp. There you may have noted the custom option set as default. Change that option to Flag. Now you can see that the image has become a kind of film strip. We need to apply a little more transformations to make it look more realistic. Use the free transform option to rotate the image a little bit. Then use Edit --> Transform -->Perspective and increase the size from the upper left and decrease the right side size. The final image after all transformations will be something similar to this.
Now we need to apply the shadow effect to make it more realistic. To do this, create a new layer, change the background color to black and select the brush option with a small brush size (i have used brush size 30). And draw a straight line across the image as shown. Hold down shift key while drawing line to get a straight line.
At first it may look a bit absurd, but photoshop can do everything!. Use the Transform --> Perspective tool to make the line shadow like image. Increase the size in the left side and decrease the size in right side. Make the right side needle like. Now use the move tool to move the shadow to the correct location. Finally, move the new layer to the layer below merged layer. Thats it.


 After cropping your image should look like mine:

 We need to reduce light intensity so go to Image > Adjustments > Hue/Saturation.


 Go to Layer > Blending Options and apply following styles:


 Create new layer and fill selected area with black color (#000000).
 Change Layer Blending Mode to Soft Light and we get a deep shadow.
 Copy layer with Ctrl+J and move it to next line. Repeat process till you have all lines with shadow.
 Apply Drop Shadow by going to Layer > Layer Style > Drop Shadow.